Showing posts with label Ubuntu. Show all posts

Dec 21, 2022

Setup Jekyll

Jekyll is one of the most popular generators for static websites and is based on Ruby. To realize the actual website, the generator uses CSS, HTML and Markdown. Jekyll also offers easy migration from WordPress or other systems to the new environment.

Here the steps I followed to setup Jekyll on Ubuntu.


Let's start with installing Ruby and prerequisites.

$ sudo apt install ruby-full build-essential zlib1g-dev

Then, setup the gem installation directory in the BASH startup.

$ echo '# Install Ruby Gems to ~/gems' >> ~/.bashrc
$ echo 'export GEM_HOME="$HOME/gems"' >> ~/.bashrc
$ echo 'export PATH="$HOME/gems/bin:$PATH"' >> ~/.bashrc
$ source ~/.bashrc

Next, install Jekyll and Bundler:

$ gem install jekyll bundler

Now, just clone from the GitHub with the theme Chirpy.

$ git clone https://github.com/cotes2020/jekyll-theme-chirpy

Last,  install the dependencies and run local server.

$ cd jekyll-theme-chirpy

$ bundler

$ bundle exec jekyll serve --host 0.0.0.0
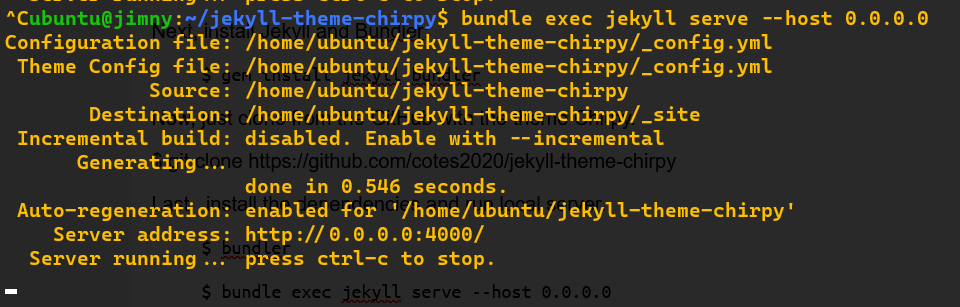
http://0.0.0.0:4000/


Dec 13, 2022

Upgrade to Python 3.11 on Ubuntu 22.04 LTS

My Ubuntu 22.04 (WSL) comes with Python 3.10.6, and I need to upgrade it to 3.11 for a workshop. (More importantly is, it claims to be 10-60% faster than the previous 3.10. 😎

Here are the steps:

$ sudo add-apt-repository ppa:deadsnakes/ppa

$ sudo apt update  

$ sudo apt install python3.11-full

$ python3.11 --version
Python 3.11.1


Next. To set Python 3.11 as default.

$ sudo update-alternatives --install /usr/bin/python3 python3 /usr/bin/python3.10 110

$ sudo update-alternatives --install /usr/bin/python3 python3 /usr/bin/python3.11 100

$ sudo update-alternatives --config python3


Oct 16, 2022

Manually Install and configure Nginx with Multipass

Found a great tutorial site at Ubuntu.

Let me follow the tutorial to setup a Nginx web server with multipass.

$ multipass launch --name nginxweb -c 2 -m 2G

$ multipass shell nginxweb

ubuntu@nginxweb:~$ sudo apt update
ubuntu@nginxweb:~$ sudo apt install nginx 

ubuntu@nginxweb:~$ cd /var/www
ubuntu@nginxweb:~$ sudo mkdir tutorial
ubuntu@nginxweb:~$ cd tutorial
ubuntu@nginxweb:~$ sudo "${EDITOR:-vi}" index.html

Insert the following content and save index.html:

<!doctype html>
<html>
<head>
    <meta charset="utf-8">
    <title>Hello, Nginx!</title>
</head>
<body>
    <h1>Hello, Nginx!</h1>
    <p>We have just configured our Nginx web server on Ubuntu Server!</p>
</body>
</html>

Next, configure Nginx web to start a new web instance at port 81.

ubuntu@nginxweb:~$ cd /etc/nginx/sites-enabled
ubuntu@nginxweb:~$ sudo "${EDITOR:-vi}" tutorial

Again, insert the following content and save the tutorial file:

server {
       listen 81;
       listen [::]:81;

       server_name example.ubuntu.com;

       root /var/www/tutorial;
       index index.html;

       location / {
               try_files $uri $uri/ =404;
       }
}

Last, restart Nginx, and capture the IP address and make sure everything is working.

ubuntu@nginxweb:~$ sudo service nginx restart

ubuntu@nginxweb:~$ ip a 

Open the browser (at host) and point to http://<ip>:81/ and http://<ip>/

(All the works complete within 4 min at my laptop)


Link:

Oct 6, 2022

Upgrade Ubuntu to 22.04 LTS Jammy Jellyfish

I have Ubuntu 20.04 installed under Windows Subsystem for Linux (WSL).

Below are the steps to upgrade Ubuntu to 22.04 Jammy Jellyfish (so that that I can enjoy my python3.10).

$ sudo apt update
$ sudo apt upgrade
$ sudo apt dist-upgrade

$ sudo apt autoremove

$ sudo apt install update-manager-core

$ sudo do-release-upgrade 

Follow by a couple of 'y' 

The whole process took around 2 hours to finish.

Links:

Oct 5, 2022

Upgrade to Python 3.10 on Ubuntu 20.04 LTS

My Ubuntu 20.04 comes with Python 3.8.10, and I need to upgrade it to 3.10 for a workshop.

Here are the steps:

$ sudo add-apt-repository ppa:deadsnakes/ppa
$ sudo apt-get update

$ apt-get update

$ apt list | grep python3.10

$ sudo apt-get install python3.10

$ sudo update-alternatives --install /usr/bin/python3 python3 /usr/bin/python3.8 1
$ sudo update-alternatives --install /usr/bin/python3 python3 /usr/bin/python3.10 2

$ sudo update-alternatives --config python3

$ python3 -V

Sep 29, 2022

Multipass Local Privileged Mounts

To access the host storage from the guest VM, we need to setup one-time configuration. First, find out the current configured value:

multipass get local.privileged-mounts

If it is false, then set the value to true:

multipass set local.privileged-mounts=true


Then, share the host's local folder (c:\Temp) to guest VM. And check if it is successful.

multipass mount c:\temp jimny:temp

multipass info jimny 

multipass umount jimny:temp


Sep 28, 2022

My Third Try on Multipass

After a few rounds of testing, you will find yourself repeating a lot of similar actions whenever creating an instance. For example:

  • creating new user
  • adding ssh public key
  • install Python, htop, Nodejs.....

YES, we can pre-configure all the actions every time a new instance is created. This is done via cloud-init.


First, create a YAML file called "cloud_init.yaml" with the following content.

users:
  - default
  - name: xx
    groups: sudo
    shell: /bin/bash
    sudo: ['ALL=(ALL) NOPASSWD:ALL']
    ssh_authorized_keys:
      - ssh-rsa <rsa keys in one line>
package_update: true
package_upgrade: true
packages:
  - nodejs
  - python3

Second, create a new instance.

multipass launch -c 2 -m 2G -d 10G -n jimny --cloud-init cloud_init.yaml

Last, login to new instance and you will find that apt is both updated and upgraded. Nodejs and Python3 are there waiting for you.

multipass info jimny

multipass shell jimny

ubuntu@jimny:~$ apt list python3 nodejs 

Sep 27, 2022

My Second Try on Multipass

All these below happen after I install Multipass (on my Windows machine).

To list images available:

multipass find


Next is to trying on creating different instance with different config.

To start an instance of Ubuntu:

multipass launch 

To start an instance of Ubuntu with a given name: jimny

multipass launch --name jimny

To start an instance of Ubuntu with specific config

multipass launch -c 2 -m 2G -d 10G -n jimny

To start an instance of docker environment with Portainer

multipass launch docker


Then, to list all the instances

multipass list

To stop and start specific instance

multipass stop jimny

multipass start jimny


In order to login and connect to specific instance

multipass shell jimny


Last to delete the instance

multipass stop jimny

multipass delete jimny

multipass purge 

multipass stop docker

multipass delete --purge docker 


Links:

May 15, 2022

First Try on Multipass

Multipass is simple a docker alternative from Canonical projects. It is a lightweight cross-platform VM manager, and is designed for developers who want a fresh Ubuntu environment with a single command.

A cloud-init can be used for post-install configuration, such as setup SSH public key or mounting a disk.

$ sudo snap install multipass --classic 

$ sudo snap refresh multipass --channel stable

$ multipass find

$ multipass launch --name kk focal

$ multipass ls

$ multipass ls --format json 

$ multipass shell kk 

$ multipass launch --name jj --cpus 2 --mem 2G 

$ multipass ls --format yaml

$ multipass info kk

$ multipass exec kk -- lsb_release -a 

$ multipass list 

$ multipass stop jj kk

$ multipass list 

$ multipass delete --purge kk

$ multipass delete --purge jj 

So fun 😜😜 and I love its' simplicity.


Links:

May 14, 2022

Adding Google Pinyin

This is my quick note on adding Google Pinyin in[ut method on my Ubuntu.

  1. Login as root.
  2. Add Chinese locales:
    • # dplg-reconfigure locales
  3. Install the required packages:
    • # apt install fcitx fcitx-pinyin fcitx-googlepinyin
  4. Run 'im-config' and change it to 'fcitx'.
  5. Reboot 
  6. Run 'fcitx-configtool'
    1. Click "+" to add new input method
    2. Uncheck "Only Show Current Language"
    3. Search for "google" to add Google Pinyin
  7. In "Global Config" tab, select the shortcut keys for switching input methods with Google Pinyin.


Links:

May 6, 2022

GHA Runners - Security In Action

An excellent write up, from Magno Logan, about the GitHub Actions (GHA), one of the commonly used CI tools today.

This article covers some security risks and best practices about using GHA as your primary CI tool.

About GitHub Actions (GHA)

GitHub Actions released in 2019. Working as CI tools, tt helps developers automate tasks within the software development life cycle (SDLC). One advantage of GHA is that developers do not need a separate CI tool but executes the workflow directly from GitHub. 

Actions are formed by a set of components. These are the six main components of a GHA:

  • Workflows: Automated procedure added to the repository, and is the actual Action itself
  • Events: An activity that triggers a workflow; these can be based on events such as push or pull requests, but they can also be scheduled using the crontab syntax
  • Jobs: A group of one or more steps that are executed inside a runner
  • Steps: These are tasks from a job that can be used to run commands
  • Actions: The standalone commands from the steps
  • Runners: A server that has the GHA runner application installed


The full article contains many more information including:

  1. GitHub Actions (GHA) and its components
  2. GitHub Action (GHA) runners
  3. Cryptomining with GitHub Actions
  4. Ubuntu Runner reconnaissance
  5. Scanning for vulnerabilities
  6. Setting up a reverse shell with Netcat and more
  7. The Mono Web Server XSP
  8. Scanning other runners
  9. Conclusions and recommendations
  10. Trend Micro solutions
GitHub Action Runners

Links:

May 1, 2022

Upgrade to Ubuntu 22.04 LTS

Just upgraded to Ubuntu 22.04 today.

As a Jumpstart, I just search for some cheatsheets like, things to do after installing Ubuntu. And I also found a very good article for introducing basic terminal tips.

Overall, Ubuntu 22.04 is simple and sweet. 🤟


Links:

Nov 24, 2021

Consistent network interface device naming

Ever wondering why the traditional network interface naming such as eth0 is renamed as ens33 nowadays?

This is known as Predictable Network Interface naming and is part of systemd/udev, since v197. 

In the past, UNIX naming scheme probe for hardware occurs in no particular order and may change between reboots. Ever since systemd v197, the interface name depens on the physical location of hardware and can be predicted/guessed by looking at lspci or lshw output.  This can have serious security implications, for example in firewall rules which are coded for certain naming schemes, and which are hence very sensitive to unpredictable changing names.

With systemd 197 there are different naming policies added into systemd/udevd by default. The following different naming schemes for network interfaces are now supported by udev natively:
  1. Names incorporating Firmware/BIOS provided index numbers for on-board devices (example: eno1)
  2. Names incorporating Firmware/BIOS provided PCI Express hotplug slot index numbers (example: ens1)
  3. Names incorporating physical/geographical location of the connector of the hardware (example: enp2s0)
  4. Names incorporating the interfaces's MAC address (example: enx78e7d1ea46da)
  5. Classic, unpredictable kernel-native ethX naming (example: eth0)

By default, systemd v197 will now name interfaces following policy 1) if that information from the firmware is applicable and available, falling back to 2) and subsequently 3) 4) 5).
 
Below is the network interface naming hierarchy captured from RedHat Enterprise website.

Network interface device naming hierarchy

When consistent device naming is enabled (default), the udev device manager generates device names based on the following schemes:

SchemeDescriptionExample

1

Device names incorporate firmware or BIOS-provided index numbers for onboard devices. If this information is not available or applicable, udev uses scheme 2.

eno1

2

Device names incorporate firmware or BIOS-provided PCI Express (PCIe) hot plug slot index numbers. If this information is not available or applicable, udev uses scheme 3.

ens1

3

Device names incorporate the physical location of the connector of the hardware. If this information is not available or applicable, udev uses scheme 5.

enp2s0

4

Device names incorporate the MAC address. Red Hat Enterprise Linux does not use this scheme by default, but administrators can optionally use it.

enx525400d5e0fb

5

The traditional unpredictable kernel naming scheme. If udev cannot apply any of the other schemes, the device manager uses this scheme.

eth0

To disable "Predictable Network Interface Names" (Ubuntu):

  •     Edit your /etc/default/grub changing the line from

    GRUB_CMDLINE_LINUX=""
    to
    GRUB_CMDLINE_LINUX="net.ifnames=0 biosdevname=0"

  •     and, finally update and reboot your system:

    $ sudo grub-mkconfig -o /boot/grub/grub.cfg
  $
sudo update-grub && sudo reboot


Links:

Oct 21, 2021

Install ModSecurity for Nginx on Ubuntu

WebApp security can be a huge challenge especially with the prevalence of malicious tools such as rootkits, scanners, bots, and other malware. Although getting breached may seem a matter of when if not if, it is prudent to implement some decent security measures to safeguard your web applications.

One of the tools that can provide a decent level of security against attacks is called ModSecurity. This is a free and open-source Web Application Firewall (WAF) that can protects your web applications from a vast array of layer 7 attacks such as cross-site scripting (XSS), SQL injection, session hijacking, and many more.

In this guide, it show how to install and configure ModSecurity to work with Nginx on Ubuntu from source.

Steps:

  1. Install dependencies
  2. Install latest Nginx version
  3. Download Nginx source package
  4. Install the Libmodsecurity3 library
  5. Download and compile ModSecurity v3 Nginx Connector
  6. Load the ModSecurity Nginx Connector module
  7. Download OWASP corerule set
  8. Testing out ModSecurity
ModSecurity

Links: