Showing posts with label RPi. Show all posts

Jan 2, 2021

Problem with an old IoT (RaspberryPi)

One problem when we work on the old raspberry pi is, we can hardly remember all the pinouts on those old model. I've an old Raspberry Pi that is an old model B with 512mb. 

And I'm try to find the power and the ground pins. When I turn to Google, most of the GPIO pinout is either for RPi4 or Rpi3.

At last, I found a way to solve my problem. 
 
First, I install a python package python-gpiozero (or python3-gpiozero). 
 
$ sudo apt install python-gpiozero
 
Then I run the command "pinout", as below, and I found the right pins (4/6) for me. ;)

Aug 30, 2014

Touch Screen Display for RPi

I got this from http://www.ebay.co.uk/itm/301239157191

3.5" Raspberry Pi Touch Screen Display Monitor 480x320 LCD + Case + Heatsinks
This 3.5 inch touch screen module is designed especially for Raspberry Pi. It transmits data though GPIO, SPI (Serial Peripheral Interface) on the P1 interface. The CPLD on the display module controls display content according to the data transmitted from the SPI interface.

Specification

  • Easy to setup and use
  • Physical Resolution: 480x320 pixels,16bit,65K color
  • 3.5 inch resistive touch screen
  • LCD Display transmits data through SPI (clock maximum speed: 125Mhz)
  • Touch panel transmits data through SPI (clock maximum speed: 16Mhz)
  • No external power supply needed
  • Built-in EEPROM storage unit
  • Open source Linux driver


The display module is built with a high speed CPLD chip (EPM3032), a SPI interfaced 4-wire resistive touch screen control chip (XPT2046), and an I2C interfaced EEPROM memory storage unit (AT24C02).

/boot/config.txt

# uncomment if you get no picture on HDMI for a default "safe" mode
hdmi_safe=1

# uncomment this if your display has a black border of unused pixels visible
# and your display can output without overscan
disable_overscan=0

# uncomment the following to adjust overscan. Use positive numbers if console
# goes off screen, and negative if there is too much border
#overscan_left=16
#overscan_right=16
#overscan_top=16
#overscan_bottom=16

# uncomment to force a console size. By default it will be display's size minus
# overscan.
framebuffer_width=960
framebuffer_height=640

# uncomment if hdmi display is not detected and composite is being output
hdmi_force_hotplug=1

# uncomment to force a specific HDMI mode (this will force VGA)
hdmi_group=1
hdmi_mode=5 hdmi_ignore_edid=0xa5000080
# uncomment to force a HDMI mode rather than DVI. This can make audio work in
# DMT (computer monitor) modes
#hdmi_drive=2

# uncomment to increase signal to HDMI, if you have interference, blanking, or
# no display
#config_hdmi_boost=4

# uncomment for composite PAL
#sdtv_mode=2

#uncomment to overclock the arm. 700 MHz is the default.
#arm_freq=800

# for more options see http://elinux.org/RPi_config.txt


Package Include:

  • 1*Tontec 3.5 inch Touch Screen
  • 1*Raspberry Pi Transparent Enclosure
  • 1*Raspberry Pi Heatsinks - set of 3

Aug 29, 2014

Kali Linux 1.0.9 Raspberry Pi image

Downloading the Kali Linux custom ARM image for my Raspberry Pi, at http://www.offensive-security.com/kali-linux-vmware-arm-image-download/

Kali Linux 1.0.9 Raspberry Pi image    Download Image    SHA1SUM: 714a6fbefc6df51b83826f93d46a36f31d54c5d1

Jul 31, 2014

Playing Audio on RPi


If omxplayer's auto-detection of the correct audio output device fails, you can force output over hdmi with:

$ omxplayer -o hdmi example.mp3

or you can force output over the headphone jack with:

$ omxplayer -o local example.mp3


To troubleshoot the sound module::
$ lsmod | grep snd_bcm2835
$ sudo modprobe snd_bcm2835

To load the sound module automatic:
cd /etc
sudo vi modules

# /etc/modules: kernel modules to load at boot time.
#
# This file contains the names of kernel modules that should be
# loaded at boot time, one per line. Lines beginning with "#" are
# ignored. Parameters can be specified after the module name.

snd-bcm2835


By default the output is set to automatically select the default audio interface (HDMI if available otherwise analog). You can force it to use a specific interface using :
$ amixer cset numid=3 n

Where <n> is the required interface : 0=auto, 1=analog, 2=hdmi. To force the Raspberry Pi to use the analog output :
$ amixer cset numid=3 1


To play a WAV file using aplay:
$ aplay police_s.wav


To play an MP3 file using mpg123:
$ sudo apt-get -y install mpg321
$ mpg321 bubbling_water_1.mp3
$ mpg321 -g 50 bubbling_water_1.mp3     # [ volume 50% ]


To play a MP3 file using Imxplayer:
$ sudo apt-get -y install omxplayer
$ omxplayer bubbling_water_1.mp3

The plus (+) and minus (-) keys can be used to adjust the volume of the playback.

Jun 30, 2014

ARMHF or ARMEL?

We like Raspberry Pi, and we wonder which distribution are we using now. Do this to find out yourself:

$ readelf -A /proc/self/exe | grep Tag_ABI_VFP_args
Tag_ABI_VFP_args: VFP registers

If the Tag_ABI_VFP_args tag is found, then you're running on an ARMHF system.  If nothing is returned, then it's ARMEL.  The example above indicates an armhf distro. And the below:

$ pi@raspberrypi:~$ readelf -A /proc/self/exe | grep Tag_ABI_VFP_args 

Nothing returned indicates that this is indeed ARMEL, which is the soft-float Debian Wheezy distribution.

May 6, 2014

Node.js is Fun

Just finished my first tutorial on Node.js. It is really fun and I'm getting more interested in Javascript now. And making it works on my Raspberry Pi is even more fun.

Feb 14, 2014

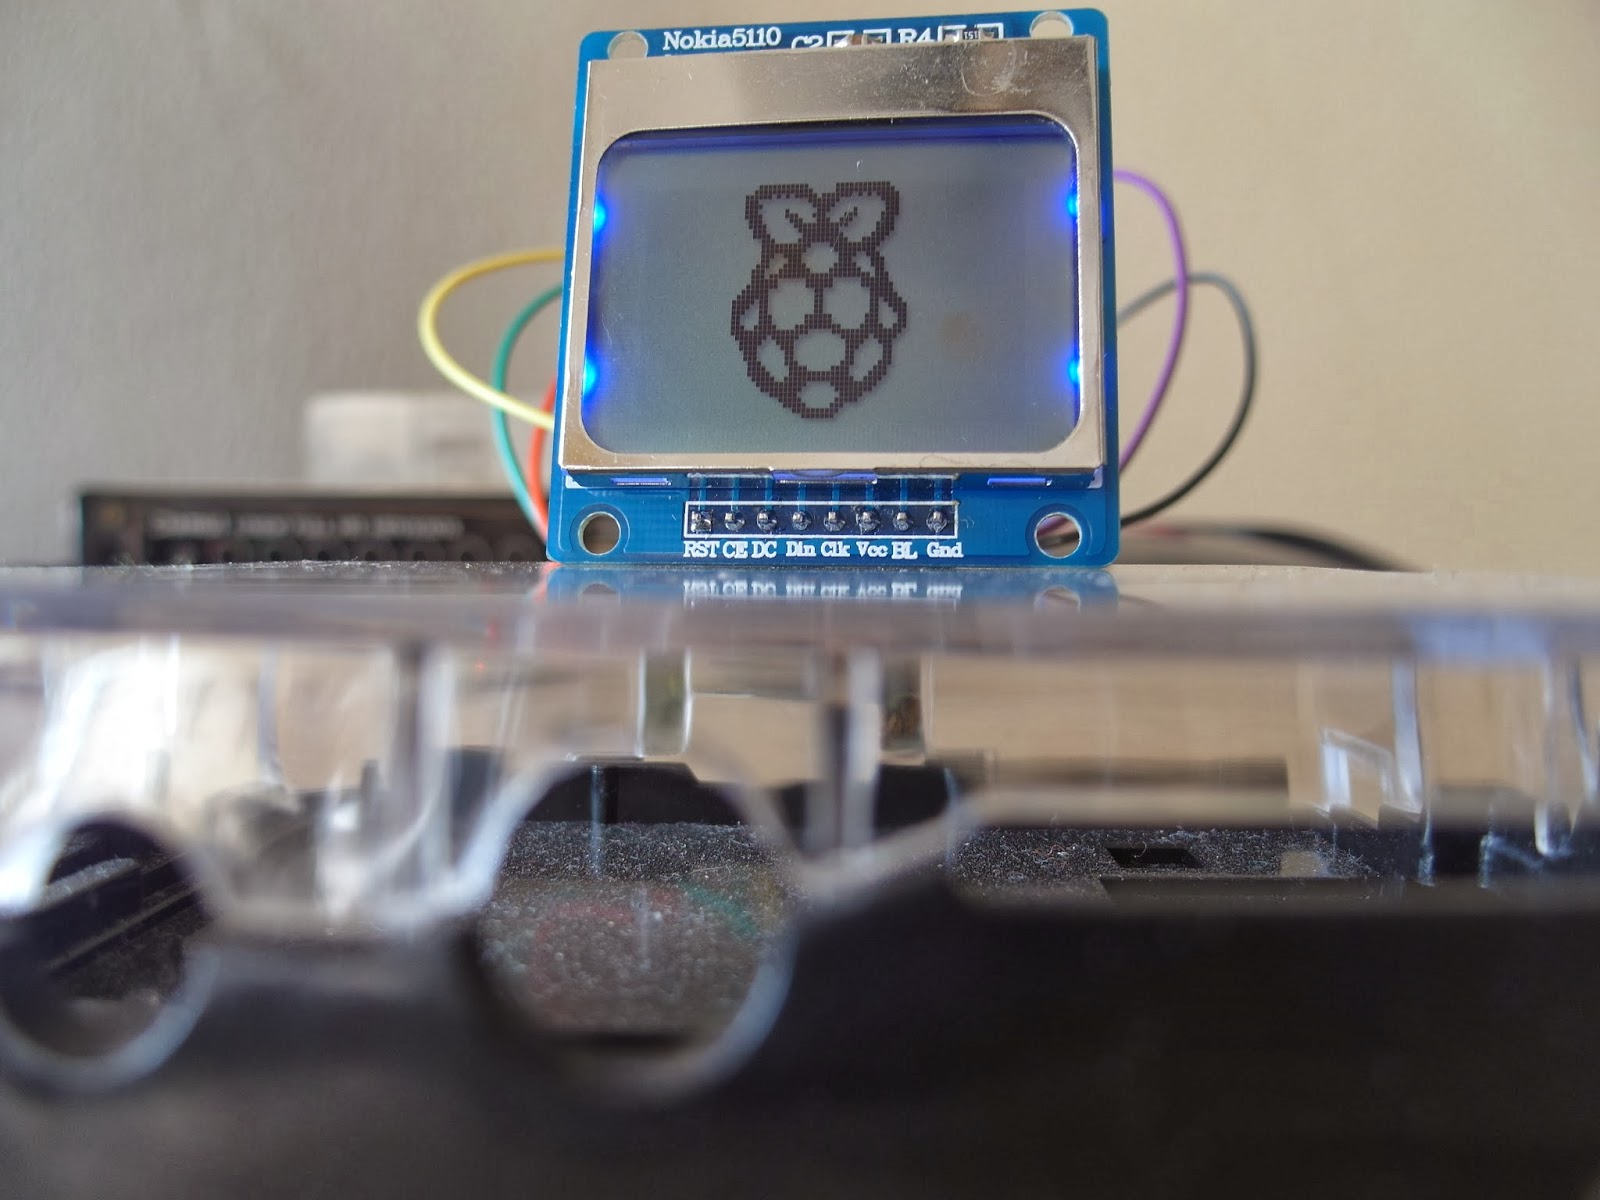
Nokia 5110 LCD as Display for RPi

Successful on getting my Nokia5110 LCD works with my RPi. Here're the photos.
sudo ./pi_logo.py

sudo ./sunclock.py

sudo ./rpimonitor-load.py

sudo ./pi_logo100.py

Jan 6, 2014

Check Temperature in Raspberry Pi

Two ways how I check the temperature in my Raspberry Pi.

As normal user:
% cat /sys/class/thermal/thermal_zone0/temp
49768
% /opt/vc/bin/vcgencmd measure_temp
VCHI initialization failed

As sudo/root:
% sudo /opt/vc/bin/vcgencmd measure_temp                
temp=49.8'C

Customize zsh for PiBang

By default, PiBang comes with zsh as the default shell.

After few days using zsh, I found that I have key binding issue. This reminds me that I need to setup key sequence and binding manually for certain keys: HOME, END, and DELETE.

So refer to setup key sequence and bindings manually.

Jan 5, 2014

Check NTP Config in RaspberryPi

Raspberry Pi has no real time clock (RTC). If you power up your RPi without Internet access, you will have wrong time/date.

RPi gets the time/date from NTP servers (a time server). To perform a quick check on your NTP servers:
ntpq -p

Jan 3, 2014

Fixed IP on RaspberryPi

I prefer fixed IP to dynamic IP address. So I just changed from dhcp to static in the /etc/network/interface file.
/etc/network/interface:
auto lo
iface lo inet loopback  
auto eth0iface eth0 inet static 
address 192.168.1.11 
netmask 255.255.255.0 
network 192.168.1.0 
broadcast 192.168.1.255 
gateway 192.168.1.1
And don't forget your DNS setting. Once you no longer get network configuration from DHCP server, you need to configure your DNS manually.

/etc/resolv.conf:
nameserver 192.168.1.1

/etc/network/interface and ifconfig output

Hi PiBang (Why I switch to PiBang)

Few reasons:

  • It has server edition. 
  • It uses SystemD (instead of SysV init).
  • It uses zsh (instead of bash).
At the same time:
  • In case I need a desktop environment, instead of LXDE, I still can have i3 (tiling WM) or OpenBox.
  • It still compatible with Rasbian sources.
Interested? Give PiBang a try now.

Reinstalling My PiBang

Today I download the latest PiBang Server edition, pibang-server-systemd-20131119.img (500++ MB and MD5: B824E42A BFCE74EF 980613EF 6109A811) Then follow by unzip it and burn the img file to my 4GB micro SD card.

Plug it into my Raspberry Pi. Connect my Raspberry Pi to TV after connect a USB keyboard. Power it once it is done.

The 1st thing it runs is, raspi-setup. Make all the necessary changes including:

  • Expand the file system.
  • Change hostname.
  • adduser pi
  • Split memory: 16MB
  • Enable camera module and SSH server.

Sep 19, 2013

Add Google Coder to my PiBang

Google Coder is a new Node.JS-based application to help kids create web pages that include HTML, JavaScript and CSS. Google releases it as a new distribution that based on wheezy Raspbian.

I don't want to re-invent the wheel, thus I try to add Google Coder to my current PiBang.
~ # cd ~git.d
~/git.d # git clone git://github.com/googlecreativelab/coder
~/git.d # cd coder/coder-base
~/git.d # npm install

Then I modified the coder/coder-base/config.js to make ensure it starts on the TCP ports that I want. See below:
exports.listenIP = null; //Defaults to *
exports.listenPort = '9181'; //the SSL port things run on
exports.httpListenPort = '9180'; //this will all be redirected to SSL
exports.cacheApps = true;
exports.httpVisiblePort = '9080'; //forwarded http port the user sees
exports.httpsVisiblePort = '9443'; //forwarded https port the user sees

Lastly, I can start it instantly with the command below:
~/git.d # cd coder/coder-base
~/git.d # npm start
Then, from another computer, I launched the browser and browse to my RPi at the URL https://192.168.1.[my-RPi-IP]:9181/ and create the password (for 'pi'). After that I just login again the newly created password and below is the screenshot:
Google Coder on PiBang 
P/S: If you want to configure the node.js to start automatic in PiBang (which using systemd instead of sysV), you will need the below. Below is my sample at /etc/systemd/system/coder.service
[Unit]
Description=Google Coder
After=network.target

[Service]
Type=simple
WorkingDirectory=/root/git.d/coder/coder-base
ExecStart=/usr/local/bin/npm start
Restart=always

[Install]
WantedBy=multi-user.target

Sep 9, 2013

Backup my RPi using Google Drive

Here's how I setup gdrive in my Raspberry Pi to backup things I want to Google Drive.

Install GDrive
After update my RPi, I install some additional packages and also GDrive.
$ sudo apt-get update
$ sudo apt-get upgrade
$ sudo apt-get install git cmake build-essential libgcrypt11-dev libjson0-dev libcurl4-openssl-dev libexpat1-dev libboost-filesystem-dev libboost-program-options-dev binutils-dev libboost-test-dev libqt4-dev libyajl-dev
 
$ git clone git://github.com/Grive/grive.git
$ cd ./grive
$ cmake .
$ make
 
$ mkdir ~/google_drive
$ cp ./grive/grive ~/google_drive

The 1st time to execute grive, I use the -a option in order to authenticate with Google. (You only have to do this once).

$ cd ../google_drive/
$ ./grive -a

The terminal will print out a very long URL. Copy and paste the URL to your browser, then click Accept button. From the browser, it will then print a long authentication code for you. Copy the authentication code an paste back to your terminal. Then the 1-time authentication is done.

Usually, I perform manual backup to my Google Drive. Just copy to google_drive folder and execute grive.

Below is an example of bash shell script to save your time.
#!/bin/bash
tar -zcvf /root/google_drive/backup_$(date +%y.%m.%d).tar.gz /etc
 
cd ./google_drive && ./grive
You may choose to setup a cronjob to execute the script as well.

Adding Node.js into Your Raspberry Pi

Node.js is a software platform that is used to build scalable network (especially server-side) applications. Node.js utilizes JavaScript as its scripting language, and achieves high throughput via non-blocking I/O and a single-threaded event loop. 
It contains a built-in HTTP server library, making it possible to run a web server without the use of external software, such as Apache/Lighttpd/nginx, and allowing more control of how the web server works.

Here's an easy way to install/upgrade Node.js on your Raspberry Pi is to use n.
npm install -g n
and use:
n 0.10.17


Jul 14, 2013

Raspberry Pwn (PenTesting with Raspberry Pi)

Raspberry Pwn (released by Pwnie Express) is turn your Raspberry Pi into a full-featured security penetration testing and auditing platform.

It is fully open-source and includes the following testing tools:
SET Fasttrack kismet aircrack-ng nmap dsniff netcat nikto xprobe scapy wireshark tcpdump ettercap hping3 medusa macchanger nbtscan john ptunnel p0f ngrep tcpflow openvpn iodine httptunnel cryptcat sipsak yersinia smbclient sslsniff tcptraceroute pbnj netdiscover netmask udptunnel dnstracer sslscan medusa ipcalc dnswalk socat onesixtyone tinyproxy dmitry fcrackzip ssldump fping ike-scan gpsd darkstat swaks arping tcpreplay sipcrack proxychains proxytunnel siege sqlmap wapiti skipfish w3af

Here's how I setup it up:
pi@raspberrypi ~ mkdir work && cd work 
pi@raspberrypi ~/work/sudo apt-get install git 
pi@raspberrypi ~/work $ git clone https://github.com/pwnieexpress/Raspberry-Pwn.git 
pi@raspberrypi ~/work/Raspberry-Pwn $ sudo ./INSTALL_raspberry_pwn.sh
Installing Raspberry Pwn

Later I'll post more articles on how the things work. Enjoy!

Jul 12, 2013

My Respberry Pi Starts

 (Model B) BCM2835 700MHz ARM1176JZF-S CPU, 512MB RAM, 8GB SD card, and 10Mbps