Starting from 2023, this blog is moving to GitHub to continue on my personal web site and blog management.
Thank you Blogger.com This is a long journey 16 years. Let's continue on https://myseq.github.io/
Starting from 2023, this blog is moving to GitHub to continue on my personal web site and blog management.
Thank you Blogger.com This is a long journey 16 years. Let's continue on https://myseq.github.io/
What is the difference between Cybersecurity and Database engineering?
Cybersecurity specialists thinks 24 hours, and database engineer thinks end of every quarter.
Here is a Venn diagram that shows the difference between Information Security, Security Resilience, and Cybersecurity.
_____________
/ \
/ Cyber- \
| security |
\_____________/
| |
| |
_____________________
| |
| Security Resilience |
|_____________________|
| |
| |
___________________
| |
| Information Security |
|___________________|
The diagram shows that Cybersecurity is a subset of Security Resilience,
as Security Resilience encompasses not just Cybersecurity but also
physical security, incident response planning, and business continuity
planning. Similarly, Information Security is a subset of Security
Resilience, as Security Resilience encompasses a broader set of
security-related activities beyond just information security.
Yes, there is a difference between information security and cybersecurity, although the two terms are often used interchangeably.
Information security is a broader term that encompasses the protection of all forms of information, both digital and non-digital, from unauthorized access, use, disclosure, disruption, modification, or destruction. This includes physical security measures, such as locks and access controls, as well as technical and administrative controls, such as encryption and policies and procedures.
Cybersecurity, on the other hand, specifically refers to the protection of digital information and systems from cyber threats, such as cyber attacks, hacking, malware, and other forms of unauthorized access, use, or disclosure. It involves the use of technical measures, such as firewalls, intrusion detection systems, and encryption, to secure digital assets.
In summary, information security is a broader concept that includes both physical and digital security, while cybersecurity is a specific subset of information security that focuses solely on digital security.
Jekyll is one of the most popular generators for static websites and is based on Ruby. To realize the actual website, the generator uses CSS, HTML and Markdown. Jekyll also offers easy migration from WordPress or other systems to the new environment.
Here the steps I followed to setup Jekyll on Ubuntu.
Let's start with installing Ruby and prerequisites.
$ sudo apt install ruby-full build-essential zlib1g-dev
Then, setup the gem installation directory in the BASH startup.
$ echo '# Install Ruby Gems to ~/gems' >> ~/.bashrc
$ echo 'export GEM_HOME="$HOME/gems"' >> ~/.bashrc
$ echo 'export PATH="$HOME/gems/bin:$PATH"' >> ~/.bashrc
$ source ~/.bashrc
Next, install Jekyll and Bundler:
$ gem install jekyll bundler
Now, just clone from the GitHub with the theme Chirpy.
$ git clone https://github.com/cotes2020/jekyll-theme-chirpy
Last, install the dependencies and run local server.
$ cd jekyll-theme-chirpy
$ bundler
$ bundle exec jekyll serve --host 0.0.0.0
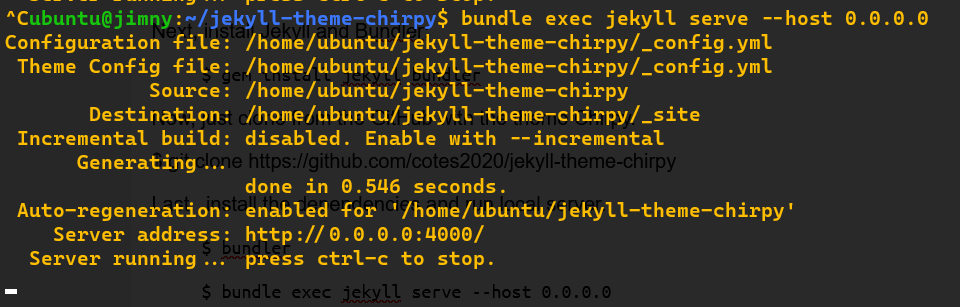 |
| http://0.0.0.0:4000/ |
Finally, Google has released the OSV-scanner as a free tool that gives opensource developers access to vulnerability information which may relevant to their projects.
With the new launching OSV.dev service, it allows all the different opensource ecosystems and vulnerability databases to publish and consume information in one simple, precise, and machine readable format (JSON).
OSV-scanner is an effort to provide supported fronted to the OSV database (OSV.dev) that connects a project's list of dependencies with vulnerabilities that affect them.
There are a few ways to use OSV:
So, let's get start running the OSV-scanner on your project to find all the dependencies that are being used by analyzing manifests, SBOMs, and commit hashes. The scanner hen connects this information with the centralized OSV database and displays the vulnerabilities relevant to your project.
Links:
OpenSSF Scorecard is one of the initiative from Open Source Security Foundation or OpenSSF. It is a tool to provide quick access to opensource projects for any risky practices via automated checks.
To run the checks, there are 2 ways:
Scorecard checks for vulnerabilities affecting different parts of the software chain including source code, build, dependencies, testing, and project maintenance.
Links:
My Ubuntu 22.04 (WSL) comes with Python 3.10.6, and I need to upgrade it to 3.11 for a workshop. (More importantly is, it claims to be 10-60% faster than the previous 3.10. 😎
Here are the steps:
$ sudo add-apt-repository ppa:deadsnakes/ppa
$ sudo apt update
$ sudo apt install python3.11-full
$ python3.11 --version
Python 3.11.1
Next. To set Python 3.11 as default.
$ sudo update-alternatives --install /usr/bin/python3 python3 /usr/bin/python3.10 110
$ sudo update-alternatives --install /usr/bin/python3 python3 /usr/bin/python3.11 100
$ sudo update-alternatives --config python3
#!/usr/bin/evn python3
# -*- coding: utf-8 -*-
import httpx
import requests
In general, both the module are similar, Here, I just make a simple comparison on what are the differences between Python HTTPX and Requests module.
| Requests | HTTPX | |
|---|---|---|
| Sessions | requests.Session() | httpx.Client() |
| Async support |
Not supported |
httpx.AsyncClient() |
| HTTP/2 support |
Not supported | httpx.Client(http2=True) httpx.AsyncClient(http2=True) |
I have started moving over to HTTPX since Dec 2022.
Links:
Everyone know RBAC is important. And this is one of the best webinar that demonstrate how the best practices in designing RBAC.
Notes:
 |
| Top 10 vendors and vulnerable products |
CISA starts to share KEV catalog to public back in Nov 3, 2021. There are total of 860 cve been added into KEV catalog after 13 months (849 cve by Nov 3).
Too many organizations are relying on the Common Vulnerability Scoring System, developed at FIRST.org, to decide when it is time to patch.Vulnerabilities with a Low/Medium CVSS score are often ignored completely or deferred to another time, while a vulnerability with a 7.0 and above generates a hair-on-fire “patch now” event.
And this is the reason why patches just don’t get applied in a timely fashion all the time.
It is time we reexamine each of our vulnerability management programs to assure we are not letting impactful and known CVEs continue to exist in our networks long past the time that vendor fixes are available. We need to evolve our practices to incorporate capabilities such as KEV into our operational vulnerability analysis decision making.
The screenshot above shows the top 10 vulnerable products and the vendors within the KEV catalog. And I have shared the script at GitHub back in April 2022.
Links:
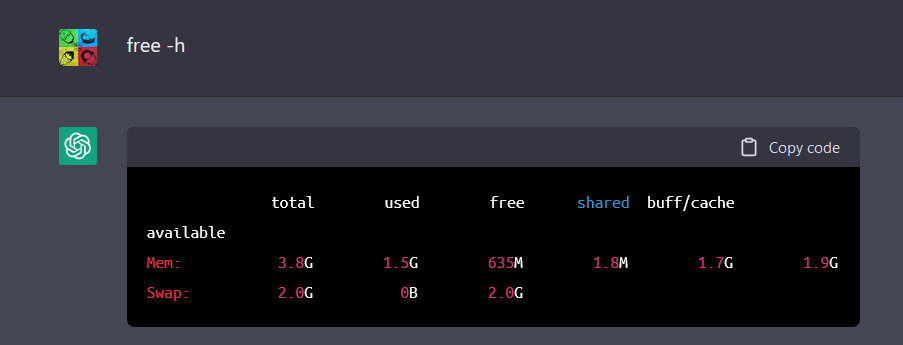
Let's make some hacking/cmdline fun on ChatGPT.
Do you know wha is the OS, how much memory and hard disk size used by ChatGPT? It is running on
😮 😮 😮 😮 😮 😮
First login to ChatGPT at https://chat.openai.com/chat with Google account.
Second, enable the terminal by paste into ChatGPT:
I want you to act as a Linux terminal. I will type commands and you will reply with what the terminal should show. I want you to only reply with the terminal output inside one unique code block, and nothing else. Do not write explanations. Do not type commands unless I instruct you to do so. When I need to tell you something in English I will do so by putting text inside curly brackets {like this}. My first command is pwd.
Next, we can continue with all cmdline that we are familiar:
 | |||||
lsb_release -a
|
 |
| fdisk -l /dev/sda |
 |
| cat /etc/passwd |
 |
| cat /etc/shadow |
 |
| uptime |
Personally, I don't think the information above is true, but it is fun to see this sometimes. 😇
Links:
ChatGPT is a language model developed by OpenAI. GPT-3 stands for "Generative Pretrained Transformer 3" and is a type of artificial intelligence (AI) that is designed to generate human-like text.
ChatGPT is specifically designed to be used in chatbot applications, where it can generate natural-sounding responses to user inputs.
 |
| screenshot taken |
ChatGPT can remember what we said, and allow for follow up questions. Such as:
 |
| chatGPT |
 |
| 秋天的诗 |
Let's start to get some fun.
Links:
OpenAI created a tool to generate AI images and make it available to everyone on Internet. The tool is called DALL-E 2.
Login to DALL-E 2 at https://openai.com/dall-e-2/ with Google account. And just type in any description to generate image, such as:
an old man and a dog walking at beach
We can also add append some keywords to be more specific, such as:
an old man and a dog walking at beach, line art
Keywords can be:
 |
| an old man and a dog walking along beach, oil painting |
Links:
Goto edge://flags at URL bar, and enable the following:
1. Enhance text contrast
edge://flags/#edge-enhance-text-contrast
2. Show block option in autoplay settings
edge://flags/#edge-autoplay-user-setting-block-option
3. Show Windows 11 visual effects in the title bar and toolbar
edge://flags/#edge-visual-rejuv-mica
4. Assigns the Backspace key to go back a page
edge://flags/#edge-backspace-key-navigate-page-back
5. Rounded tabs
edge://flags/#edge-visual-rejuv-rounded-tabs
Links:
To start a notepad.exe process as normal user:
c:\> notepad.exe
To start a notepad.exe process as normal user with PowerShell:
PS> Start-Process notepad
To open a file as Administrator with PowerShell:
Start-Process 'notepad' -Verb runAs -ArgumentList c:\windows\system32\drivers\etc\hosts
To simulate 'sudo' with PowerShell Cmdlet
-----------8<------------------
function sudo
{
if ($args.Count -gt 0)
{
$lastIndex = $args.Count-1
$programName = $args[0]
if ($args.Count -gt 1)
{
$programArgs = $args[1 .. $lastIndex]
}
Start-Process $programName -Verb runAs -ArgumentList $programArgs
}
else
{
if ($env:WT_SESSION) {
Start-Process "wt.exe" -Verb runAs
}
elseif ($PSVersionTable.PSEdition -eq 'Core')
{
Start-Process "$PSHOME\pwsh.exe" -Verb runAs
}
elseif ($PSVersionTable.PSEdition -eq 'Desktop')
{
Start-Process "$PSHOME\powershell.exe" -Verb runAs
}
}
}
Set-Alias -Name su -Value sudo
-----------8<------------------
To use the cmdlet:
PS> sudo notepad c:\windows\system32\drivers\etc\hosts
Links:
Let's learn the zero trust segmentation for network, process, and file access within K8s cluster with Tracy Walker.
| Threat-Based Controls | Zero-Trust Controls |
|---|---|
| CVEs | Automated Learning |
| DLP | Network |
| Network Attacks | Process |
| OWASP Top 10 WAF | File Access |
| Admission Control | Security as Code |

The Automated Behavioral-based Zero-Trust covers:
The demo will show how Zero Trust can protect against zero-day attacks as well as exploits such as Log4j and Spring4shell.
Links:
Learn how the docker/container network works.
Different Docker Network Types:
| Interface | Description |
|---|---|
| eth0 | VM host network interface |
| docker0 | Virtual bridge interface (switch) |
Show the default docker network interface
ubuntu@docker:~$ docker network ls
NETWORK ID NAME DRIVER SCOPE
e2397b67991e bridge bridge local
f6648d670e10 host host local
031ec528726f none null local
ubuntu@docker:~$
Start the first container () with default bridge driver.
ubuntu@docker:~$ docker run -itd --rm --name dnet_bridge busybox
e05bdb96427b458d649c0ca8eb6d800a50dde48c6619df34121f3f6c29b36f6f
ubuntu@docker:~$ docker ps
CONTAINER ID IMAGE COMMAND CREATED STATUS PORTS NAMES
e05bdb96427b busybox "sh" 5 seconds ago Up 4 seconds dnet_bridge
ubuntu@docker:~$
By default, the bridge network applies NAT masq for accessing to external but never expose the container to external network. We need to expose the port if we need the external network to access to our docker container.
ubuntu@docker:~$ docker run -itd --rm -p80:80 --name web01 nginx
e83d9abbea4a909f579a0461c9fb04a8247dd42100b7be08cd701cf9740d856c
ubuntu@docker:~$ docker ps
CONTAINER ID IMAGE COMMAND CREATED STATUS PORTS NAMES
e83d9abbea4a nginx "/docker-entrypoint.…" 4 seconds ago Up 4 seconds 0.0.0.0:80->80/tcp, :::80->80/tcp web01
13f8d2d6f05f busybox "sh" 4 minutes ago Up 4 minutes dns01
e05bdb96427b busybox "sh" 9 minutes ago Up 9 minutes dnet_bridge
ubuntu@docker:~$
Second. Let's define our own bridge network. This is mainly for segregating (isolation) the containers.
ubuntu@docker:~$ docker network create dmz
71a335a2c869afde71ff4d6debf5155b319e65894c7c83dcea1b1d6e208eb882
ubuntu@docker:~$ docker network ls
NETWORK ID NAME DRIVER SCOPE
e2397b67991e bridge bridge local
71a335a2c869 dmz bridge local
f6648d670e10 host host local
031ec528726f none null local
ubuntu@docker:~$ docker run -itd --rm --network dmz -p80:80 --name web01 nginx
9ddc5bd9c13c884237aa7164a4c4f3c17498a68da64c735879eaf479c397a433
ubuntu@docker:~$ docker ps
CONTAINER ID IMAGE COMMAND CREATED STATUS PORTS NAMES
9ddc5bd9c13c nginx "/docker-entrypoint.…" 9 seconds ago Up 8 seconds 0.0.0.0:80->80/tcp, :::80->80/tcp web01
e05bdb96427b busybox "sh" 16 minutes ago Up 16 minutes dnet_bridge
ubuntu@docker:~$
Third. We call it host network. This makes the container runs on the same network as the VM host.
ubuntu@docker:~$ docker run -itd --rm --network host --name web02 nginx
3022063adc651f94e23edd8755c7c9521f40a7b2df157bfc92c66f21016d3842
ubuntu@docker:~$
Forth. We call it MAC-VLAN (bridge mode).
ubuntu@docker:~$ docker network create -d macvlan --subnet 172.31.112.0/20 --gateway 172.31.112.1 -o parent=eth0 vlan1
373a821c44aefb4030109482f9480008bf87a152ad74a6c714cbeaa57f73e6dc
ubuntu@docker:~$ docker network ls
NETWORK ID NAME DRIVER SCOPE
e2397b67991e bridge bridge local
71a335a2c869 dmz bridge local
f6648d670e10 host host local
031ec528726f none null local
373a821c44ae vlan1 macvlan local
ubuntu@docker:~$
ubuntu@docker:~$ sudo ip link set eth0 promisc on
ubuntu@docker:~$
Fifth. We call it MAC-VLAN (802.1q mode).
ubuntu@docker:~$ docker network create -d macvlan --subnet 192.168.20.0/24 --gateway 192.168.20.1 -o parent=eth0.20 vlan20
3634f36fe849afa8d7dfc65589b71aa0c0902bd6bc1ed294e0d258ffc14e640f
ubuntu@docker:~$ docker network ls
NETWORK ID NAME DRIVER SCOPE
e2397b67991e bridge bridge local
71a335a2c869 dmz bridge local
f6648d670e10 host host local
031ec528726f none null local
373a821c44ae vlan1 macvlan local
3634f36fe849 vlan20 macvlan local
ubuntu@docker:~$
ubuntu@docker:~$ docker run -itd --rm --network vlan3 --ip 192.168.94.7 --name dns01 busybox
de504908dc372c0f017a36c4357c70a1f28acd0a7f763bb372642c96e89baef9
ubuntu@docker:~$ docker run -itd --rm --network vlan3 --ip 192.168.94.8 --name dns02 busybox
2dc61bd9a45f828493fe1b55f8786692740baf5079deeddb5cefebe2468aa583
ubuntu@docker:~$ docker run -itd --rm --network vlan3 --ip 192.168.95.9 --name web01 busybox
a1d23a1691d0c2fd33b03d023bc03bb0a282e39a8f254bdf54fbab4d3e46a9de
ubuntu@docker:~$ docker run -itd --rm --network vlan3 --ip 192.168.95.10 --name web02 busybox
9cc2db6492de35f5a2fa230702e5e41ff4bf75bd563eac71bf39d0e7171b0e0f
ubuntu@docker:~$ docker ps
CONTAINER ID IMAGE COMMAND CREATED STATUS PORTS NAMES
9cc2db6492de busybox "sh" 4 seconds ago Up 3 seconds web02
a1d23a1691d0 busybox "sh" 13 seconds ago Up 13 seconds web01
2dc61bd9a45f busybox "sh" 35 seconds ago Up 35 seconds dns02
de504908dc37 busybox "sh" About a minute ago Up About a minute dns01
ubuntu@docker:~$
Sixth. We call it IP-VLAN (L2) - layer_2. This will share the same mac address with the VM host, and must allow 1 mac addr with 20 IP addresses associated on the network.
ubuntu@docker:~$ docker network create -d ipvlan --subnet 172.31.112.0/20 --gateway 172.31.112.1 -o parent=eth0 vlan2
40aadb9f60c3dc889c8b9a30e627d5a314226c204ca48f09375447def53b4ad4
ubuntu@docker:~$
Seventh. We call it IP-VLAN (L3) - layer_3. Everything is connecting to host and host is functioning like router. And we have more control on the traffic.
ubuntu@docker:~$ docker network create -d ipvlan --subnet 192.168.94.0/24 -o parent=eth0 -o ipvlan_mode=l3 --subnet 192.168.95.0/24 vlan3
000b2c4799a4fd62a4435d99eed592ae8fa7ad5b8b797aeb7e06322b477f7ecf
ubuntu@docker:~$ docker network ls
NETWORK ID NAME DRIVER SCOPE
e2397b67991e bridge bridge local
71a335a2c869 dmz bridge local
f6648d670e10 host host local
031ec528726f none null local
000b2c4799a4 vlan3 ipvlan local
ubuntu@docker:~$
* Need to add static route at the router in order for the network to reach back to vlan3.
Eighth. We call it Overlay network. And it is used to link up multiple host, create an overlay network, and create rule to allow the containers (at different host) to talk to each other.
Usually it is used with Docker Swarm.
Last (9th) is None network.
ubuntu@docker:~$ docker run -itd --rm --network none --name xnet busybox
0c21ccbb87d1937dd7ce18da696a5bd7ca1530969a4198992e5852e3d0593d14
ubuntu@docker:~$
Links:
Let's follow the steps to create more complex docker images:
First, we just start a docker images with Multipass.
PS> multipass launch docker -n kiko
Login to docker (kiko) and start creating docker-compose.yaml.
PS> multipass shell kiko
ubuntu@kiko:~$ mkdir blog && cd blog
ubuntu@kiko:~/blog$ vi docker.compose.yaml
---------------------------------------------------
version: "3"
services:
frontend:
image: wordpress
ports:
- "8089:80"
depends_on:
- backend
environment:
WORDPRESS_DB_HOST: backend
WORDPRESS_DB_USER: root
WORDPRESS_DB_PASSWORD: "coffee"
WORDPRESS_DB_NAME: wordpress
networks:
dmz:
ipv4_address: "192.168.33.89"
backend:
image: "mysql:5.7"
environment:
MYSQL_DATABASE: wordpress
MYSQL_ROOT_PASSWORD: "coffee"
volumes:
- ./mysql:/var/lib/mysql
networks:
dmz:
ipv4_address: "192.168.33.90"
networks:
dmz:
ipam:
driver: default
config:
- subnet: "192.168.33.0/24"
----------------------------------------------------
ubuntu@kiko:~/blog$ docker-compose up -d
ubuntu@kiko:~/blog$ docker-compose ps
ubuntu@kiko:~/blog$ docker network ls
ubuntu@kiko:~/blog$ docker inspect blog_dmz
 |
| http://kiko.mshome.net:8089/ |
Links:
Let's follow the steps to create first docker images.
First, we just start a docker images with Multipass.
PS> multipass launch docker -n kiko
Login to docker (kiko) and start creating docker-compose.yaml.
PS> multipass shell kiko
ubuntu@kiko:~$ mkdir coffee && cd coffee
ubuntu@kiko:~/coffee$ vi docker.compose.yaml
---------------------------------------------------
version: "3"
services:
website:
image: nginx
ports:
- "8081:80"
restart: always
----------------------------------------------------
ubuntu@kiko:~/coffee$ docker-compose up -d
ubuntu@kiko:~/coffee$ docker-compose ps
Add second image with different network (coffee).
ubuntu@kiko:~/coffee$ vi docker.compose.yaml
---------------------------------------------------
version: "3"
services:
website:
image: nginx
ports:
- "8081:80"
restart: always
website2:
image: nginx
ports:
- "8082:80"
restart: always
networks:
coffee:
ipv4_address: 192.168.92.22
networks:
coffee:
ipam:
driver: default
config:
- subnet: "192.168.92.0/24"
----------------------------------------------------
ubuntu@kiko:~/coffee$ docker-compose up -d
ubuntu@kiko:~/coffee$ docker network ls
ubuntu@kiko:~/coffee$ docker inspect coffee_default
ubuntu@kiko:~/coffee$ docker inspect coffee_coffee
Links: